
The process of releasing a new change to your iOS app is time-consuming — but before you even get to that stage, you want to make sure your app has gone through sufficient testing. Software development practices such as continuous integration and continuous delivery will help you reduce cycle times for delivering new changes by introducing automation for building, testing, and deploying your iOS app. Another one of the important topics is signing and provisioning profiles for iOS apps.
At Bitrise we are building a mobile CI/CD platform as a service, to help mobile engineers to deliver high-quality apps faster.
If you have been looking to switch from Jenkins to Bitrise CI/CD to speed up your iOS CI/CD flow and ease dedicated manpower, this article is for you! I will discuss how to migrate your iOS app from Jenkins and fastlane to Bitrise, covering the following steps:
- Manage the app dependencies
- Increment version/build number
- Obtain Certificates and Provisioning profiles to sign the app
- Check code style and conventions
- Perform Unit tests
- Perform UI tests
- Release build to TestFlight
- Release a new version for the Apple Store
- Generate screenshots
- Send a Slack notification with the build statuses
Before you get started
Before we get started with this article, I will assume that your Jenkins server is installed on a macOS machine and configured for the iOS app and fastlane with the following:
- Installed Java and JDK on macOS machine for Jenkins
- Installed XCode and XCode command line developer tools
- installed and configured Jenkins on a macOS machine
- Installed Homebrew
- Installed Ruby and RVM on your build server (and also on your local development machine)
- Installed fastlane tools on your build server (and also on your local development machine)
- Installed Bundler
- Added Ruby and fastlane in the PATH to be able to use them with Jenkins
- Installed and configured the fastlane plugins (in case you will use Firebase but in our case, we will use TestFlight)
- firebase_app_distribution
- Firebase_testlab
- Integrate fastlane into your project and created an example lane
- Installed and configure the Jenkins Environment Variables for the following:
- Git > The path to Git executable
- Configured fastlane match: the approach to iOS’s codesigning which makes it easy for teams to manage the required certificates and provisioning profiles for your iOS apps.
And inside your project, You should have a fastlane folder including the following files:

- The Appfile contains app-specific information

- The Pluginfile contains plugin dependencies (auto-generated when you install dependencies).

TIP
you can create new lanes in your Fastfile if you’d like to test or distribute your app using Firebase.
- The Matchfile contains the git URL storing all code signing identities, type, and storage mode.

- The Fastfile is the brain of the whole process including the following lanes:
- Setup Lanes

- Unit, UI Tests, and Check Style lanes
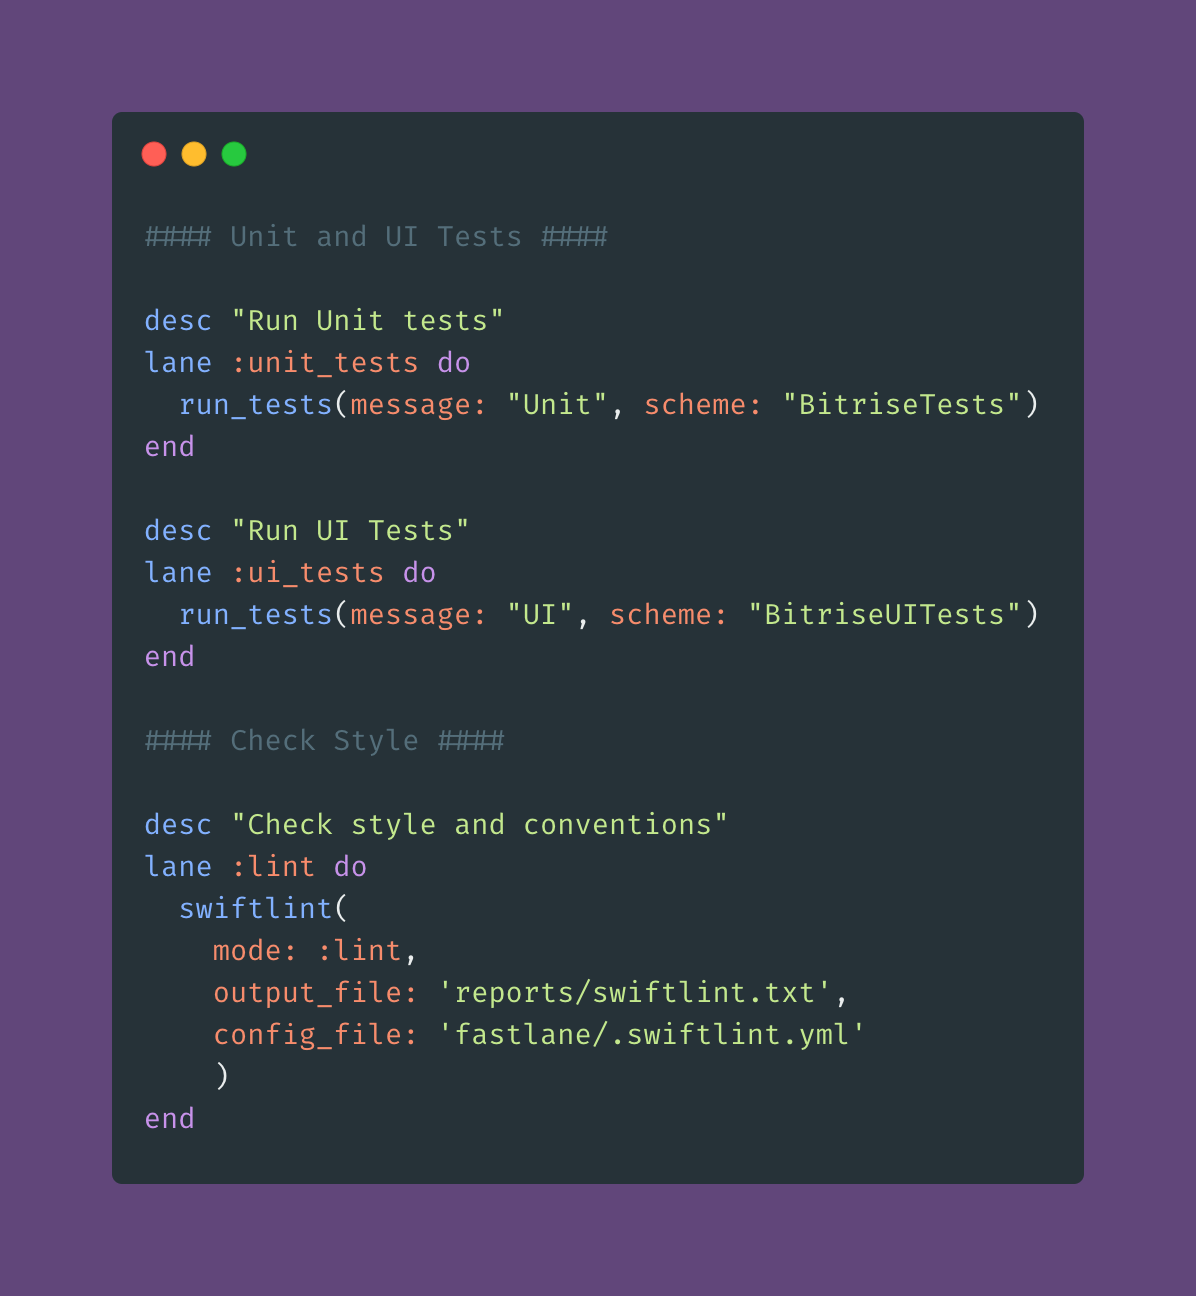
- Releases Lanes

- Private Lanes

- Configuration Lanes

And in your project root you should have Gemfile and Gemfile.lock files including the Ruby dependencies for the project and we can install them by bundle install.
You should also have the following requirements:
- Apple ID account, this will be mandatory to automatically create the necessary certificates and provisioning profiles, and also to upload the applications to TestFlight or the App Store
- The GitHub private repository stores the encrypted certificates and provisioning profiles used in the project.
Then you should have a Jenkins pipeline project that includes the Jenkinsfile with the following setup:

And the final pipeline should look like this:


As you can see, setting up an iOS project with Jenkins requires a lot of steps, including server configuration, install plugins, and writing the Jenkinsfile from scratch using Groovy code. This also requires additional skills with Groovy programming languages and you will also need help from the DevOps team to install and configure Jenkins.
Now it’s time to speed your CI/CD pipeline with easy setup and less effort. Let’s get started by migrating our iOS app from Jenkins and fastlane to Bitrise:
1. First, you need to create a new free account from the Bitrise website, you can use your email or any other account you prefer as displayed in the following screenshot.

2. After logging in, you will have an blank dashboard and you can start adding your projects.
3. Click on Add your first app button.
4. Select your account and set the privacy for the App (Private or Public) and click Next.

5. Choose the Repository but before that, you have to give Bitrise access rights to your source code provider. (ex: Bitbucket)
6. You need to set up the repository access, so you can click on auto-add SSH key or add your SSH key.

7. Choose Branch name (ex: master branch) and click Next.

8. Once you clicked next, Bitrise will run a validation with your repository and configuration

9. After validating, the project build configuration will display successfully (ex: iOS App). Since we have fastlane files in our repository, the scanner detected that and suggested choosing between a normal iOS app or fastlane.

Click on fastlane and you’ll have the project build configuration to review the stack. You can also change the lane name from the Fastfile if needed.

TIP
Bitrise supports the latest Xcode versions within 48 hours after Apple’s announcement, to give mobile engineers the opportunity to update their apps and use new features with the latest SDKs for iOS, iPad, watchOS, and the latest OS like macOS Big Sur. for more info check this blog post.
10. Click the confirm button after reviewing the workflow stack. You can add the app icon as well, or you can skip it for now.

11. The final step is Webhook setup: you just need to click on Register a Webhook for me! Button and you will trigger your first iOS build for your project 🚀 🎉


12. You will be redirected to the build log and you can check the steps and the build status.


13. At the end, you will find a summary of all the tasks that you run during the build with time and steps name. You can also download logs or check the apps and artifacts.

You will also receive an email notification about the build status.

NOTE: As you may have noticed, we didn’t need to configure or install any prerequisites related to the infrastructure or the stack because Bitrise is managing all of these things instead of us. For example, installing and configuring Xcode, Xcode command-line developer tools, fastlane, Homebrew, or Git.
14. Now, let’s open the Workflow Editor to start migrating all the required steps that we have in the Jenkinsfile.

15. In the Workflow Editor, you will find that we already have the predefined Steps added.

Let’s remember the steps that we need to migrate from Jenkins and fastlane to Bitrise for the iOS app:
- Manage the app dependencies
- Increment version/build number
- Obtain Certificates and Provisioning profiles to sign the app
- Build the app
- Perform UI tests
- Uploading build to the beta testers
- Update AppStore screenshots and metadata
- Send a Slack notification with the build statuses
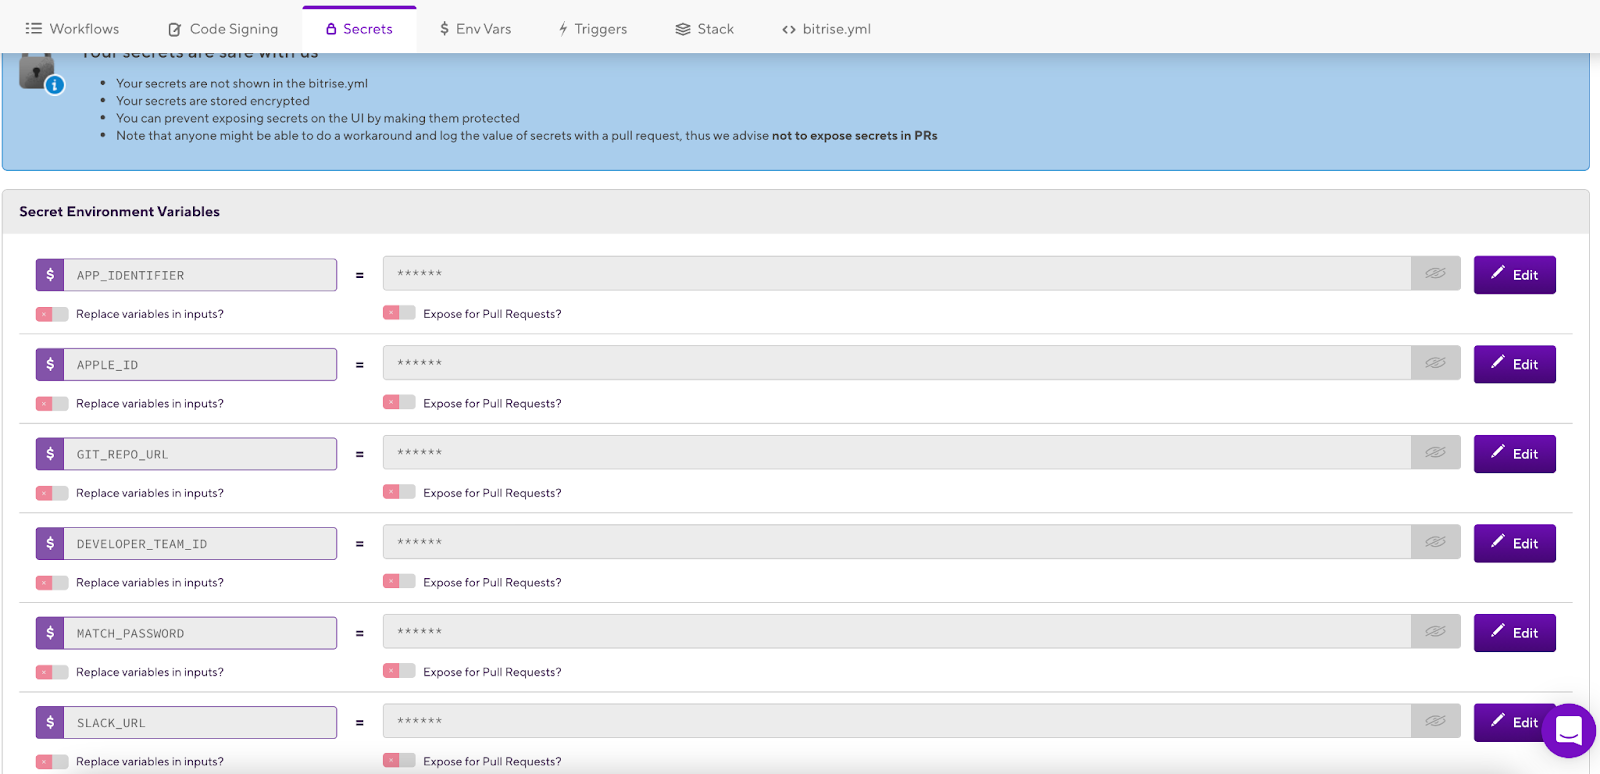
16. Click on the Secrets tab to add your Environment variables such as:
- APP_IDENTIFIER
- APPLE_ID
- GIT_REPO_URL
- DEVELOPER_TEAM_ID
- MATCH_PASSWORD
- SLACK_URL
17. Click on Env Vars Tab to add any other Environment Variables you need in your application. DO NOT add private information here, because these Environment Variables will also be available in builds triggered by pull requests and bitrise.yml.

18. Click on Workflow Editor tab to start adding the missing steps into your CI/CD workflow.
TIP: You can rename the Workflow’s default name from primary to for example iOS CI/CD.

19. We have already a step for the Active SSH Key and Git Clone Repository to be able to access and clone the source code from GitHub or any other source code management tool.

20. Also, we have steps for the Certificate and profile installer and fastlane to run the lane that we configured at the project setup.

And here we should decide how we will manage the certificates and profile singing. You have a couple of options to choose from. You can add one of Bitrise’s code signing Steps, such as Certificate and profile installer, iOS Auto Provision, and fastlane Match to your Workflow. Alternatively, you can use the fastlane match inside our fastlane lane instead of a code signing Step.
Make sure you either use the fastlane Match Step or set up the fastlane match in your lane but don’t try to do both. You should either use your existing lane or use the fastlane Match integration Step.
For more information check the fastlane integration tools documentation and how to configure fastlane match for Bitrise.
21. We will add new Steps to run the different lanes that we have in our Fastfile by click on the [+] button which will display all the integration steps that we have for iOS applications in Bitrise.

TIP: Bitrise has 320+ integration steps for all the mobile platforms with different categories.
22. We can add a CocoaPods Step to install our applications dependencies.

23. Then add the Fastlane Match Step to with the following configuration:

24. Add fastlane steps for all of our lanes in the Fastfile by calling the lane name only.

25. Add the Send a Slack message Step at the end of the Workflow to send the final status of the build.

TIP: For each step in the Bitrise Workflow we have an option to run the current Step, whether the previous Step failed or not. This will help us to abort the build if any previous Steps failed and avoid wasting the time. (it’s set to No by default)

26. You can now run your iOS CI/CD workflow manually by clicking on Start/Schedule a build or base on the trigger map with Bitrise, for example you can specify GitHub Tag or branch with a specific Workflow.


TIP: If you want to schedule the build to run nightly you can also configure it easily by selecting the date/time, branch name, and the Workflow name.


TIP: You can find the bitrise.yml file including all the Steps that we added in the Workflow editor and you can save it in your repository or leave it on the Bitrise.io website. TIP: if the iOS team is scaling and you need to reduce the build times, you can use an additional feature from Bitrise to run parallel builds. You can run different sub or small Workflows at the same time to reduce the main Workflow time. Check the Bitrise Start Build or this article on how you can use it for your iOS app.


TIP: if the iOS team is scaling and you need to reduce the build times, you can use an additional feature from Bitrise to run parallel builds. You can run different sub or small Workflows at the same time to reduce the main Workflow time. Check the Bitrise Start Build or this article on how you can use it for your iOS app.
Congratulations! 🎉You have successfully migrated your iOS app from Jenkins and fastlane to Bitrise. You can now start building and releasing your applications seamlessly, with no extra effort.
Further Reading:
I hope you found this article useful. For even more information, you can visit our detailed migration guide on Devcenter or check out our Jenkins vs. Bitrise page comparing the main features of the two tools.
If you have any questions, feel free to contact us on our Twitter or via email. If you’d like to find out more about how Bitrise can help you release better apps, faster, you can also request a demo here.

%202.png)

