
The purpose of this tutorial is to show you how to create a simple Flutter app, including a web app, then how to deploy and host it on Firebase Hosting using the Firebase CLI locally and Bitrise CI/CD pipelines.
Sounds interesting? Let’s get started!
What’s Flutter?

Flutter is an open-source framework by Google for building beautiful, natively compiled, multi-platform applications from a single codebase. You can build, test, and deploy beautiful mobile, web, desktop, and embedded apps from a single codebase.
What’s Firebase?
Firebase is a platform for developing mobile and web applications by Google. It provides tools and infrastructure via software development kits that are intended to enable a developer to provide simpler and more efficient operations through programming interfaces adapted to various platforms.
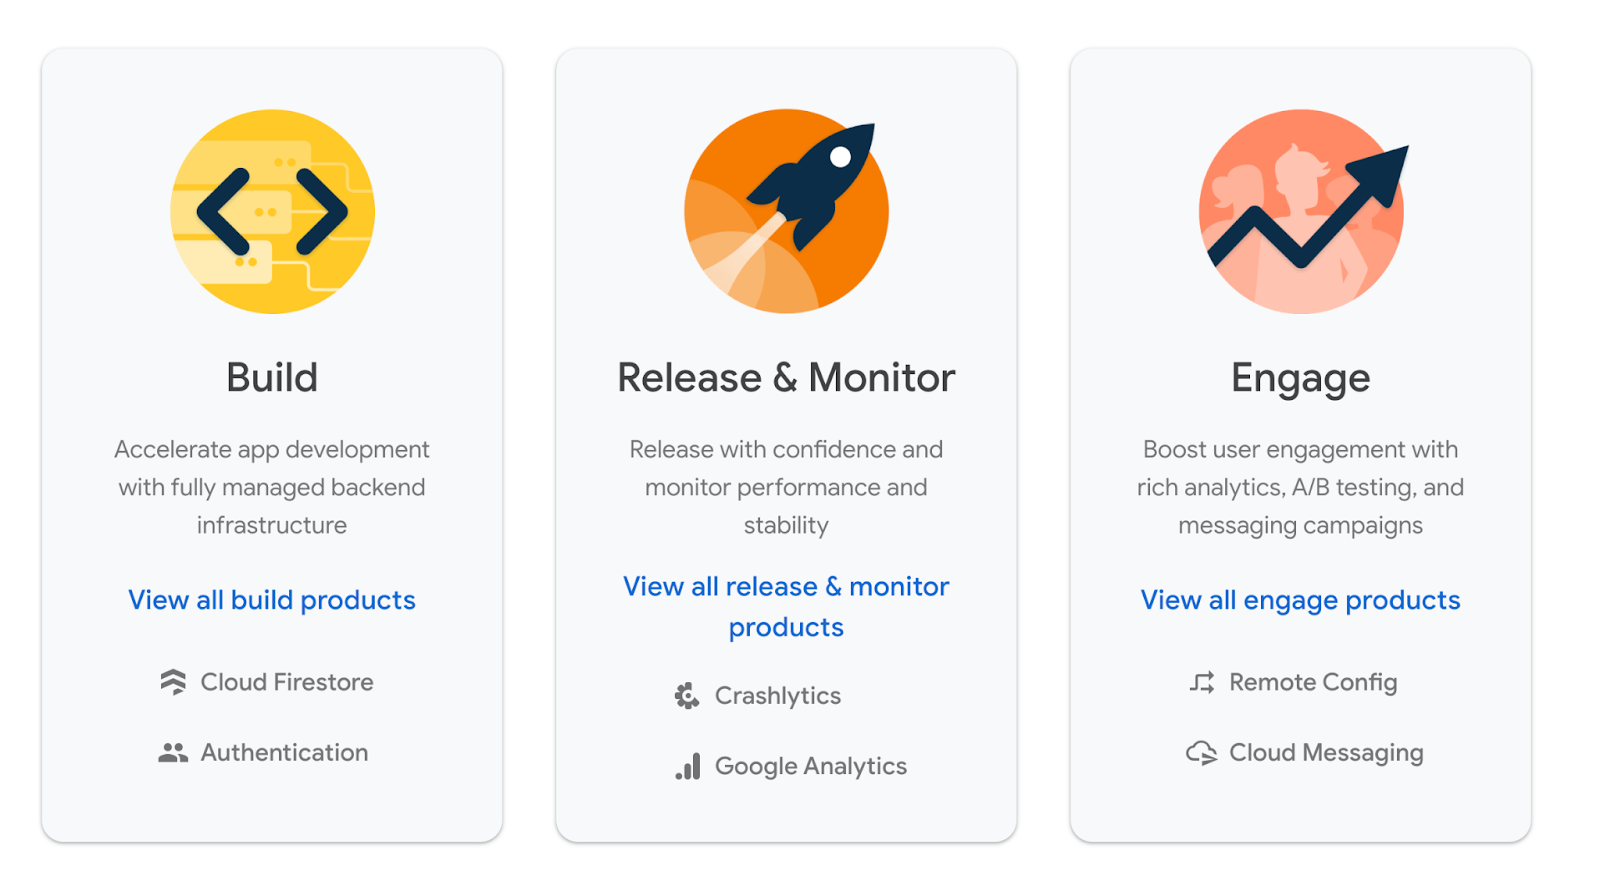
Firebase provides us with different solutions you can rely on through your app's journey from build to release, monitor, and engage including different products such as the following list:
Firebase Hosting
Firebase Hosting helps us to deploy a single-page web app, a mobile app landing page, a Flutter web app, or a progressive web app without all the hassle.
Firebase Hosting gives us the infrastructure, tooling, and features we need to deploy and manage websites and apps. Firebase Hosting automatically provisions and configures an SSL certificate for each site deployed and you can connect a custom domain with painless verification.
Also, you can deploy your app from a local directory or via CI/CD pipelines to the web only takes one command and you can see the deployment history and roll back to a previous version from the Firebase console easily.
How does it work?
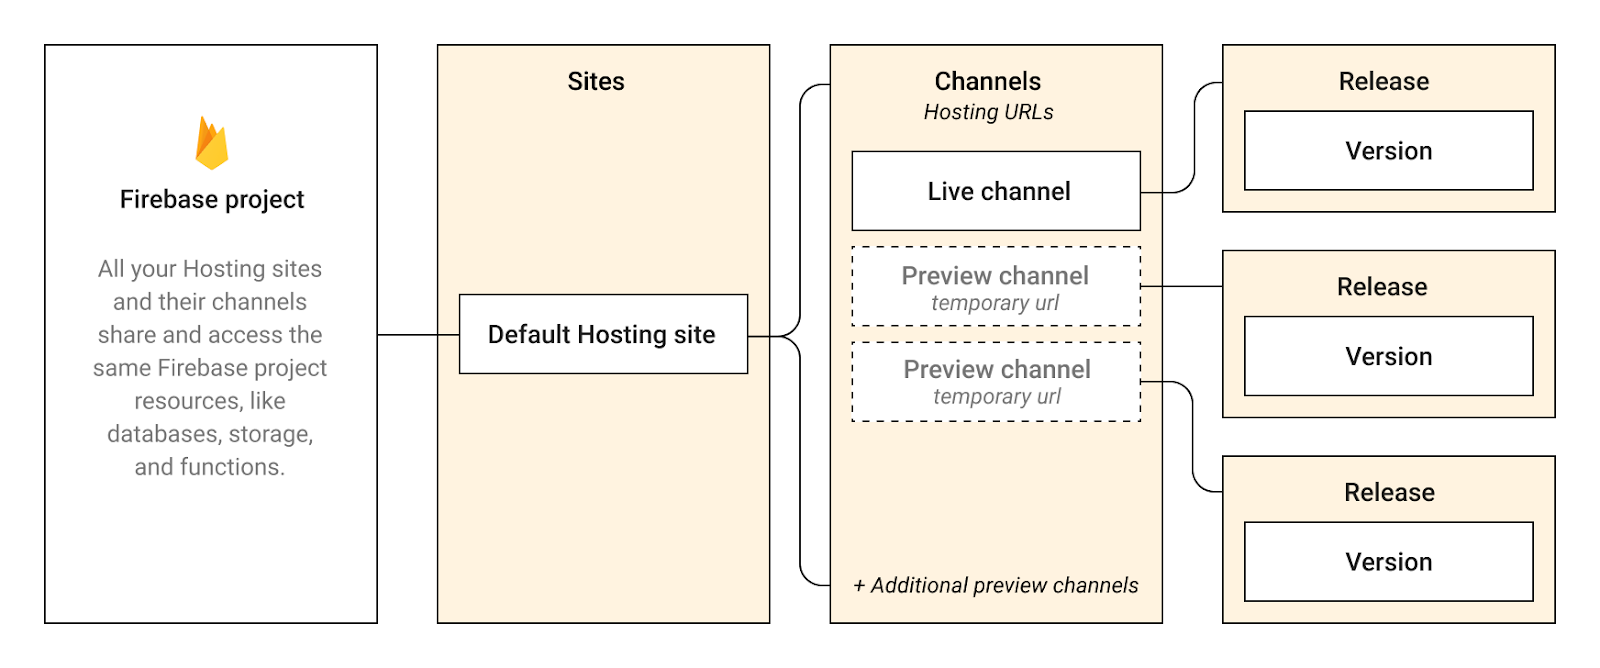
Every Firebase project has a default Hosting site. A site contains one or more channels, where each channel is associated with a URL that serves specific content and a Hosting configuration.
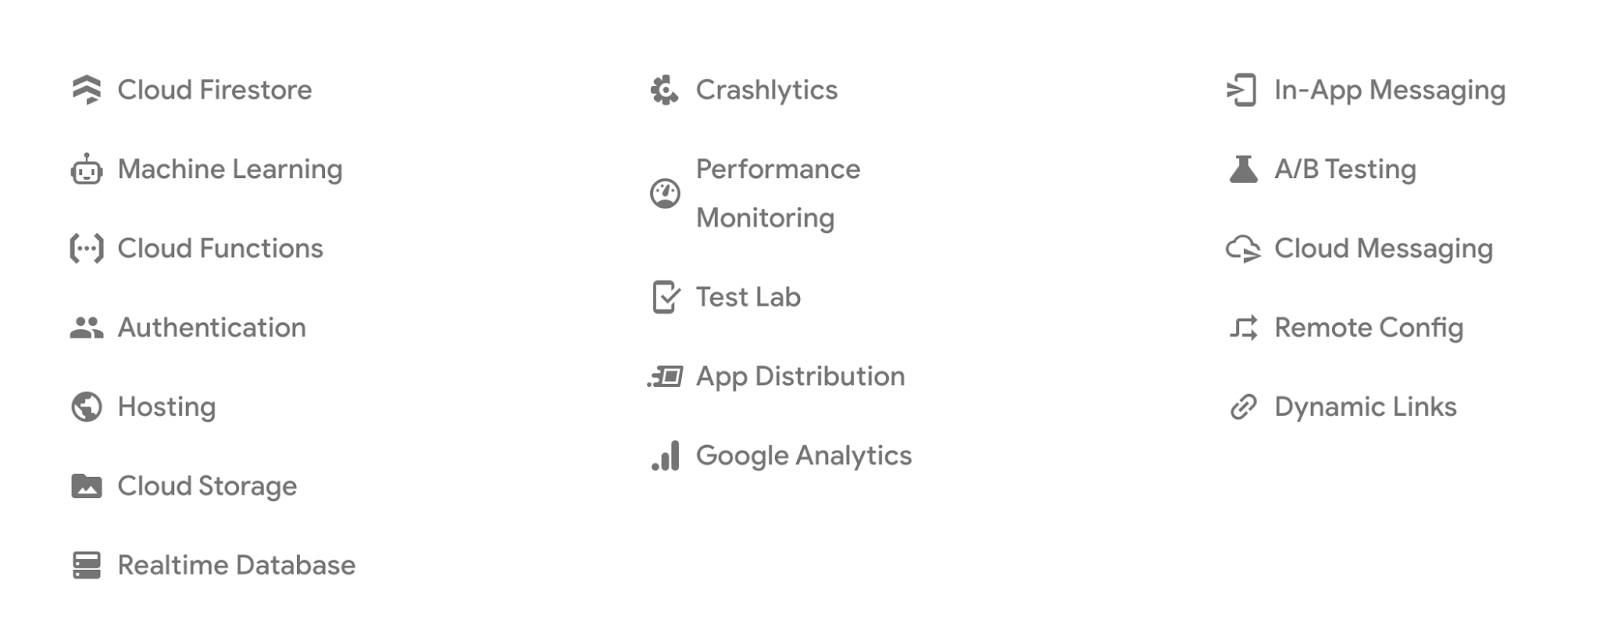
Firebase Hosting works out of the box with Firebase services, such as Cloud Functions, Authentication, Realtime Database, Cloud Firestore, and Cloud Messaging. You can build powerful microservices and web apps using these complimentary Firebase services.
Getting started with Flutter Web
To create a Flutter app with web support, you need the following software:
- Flutter SDK
- Chrome debugging a web app requires the Chrome browser.
- An IDE that supports Flutter such as IntelliJ IDEA, or Visual Studio Code, and install the Flutter and Dart plugins to enable language support.
Let’s create a simple Flutter application
- Open the terminal and run the following command:
flutter create flutterfirebase- Goto inside the folder
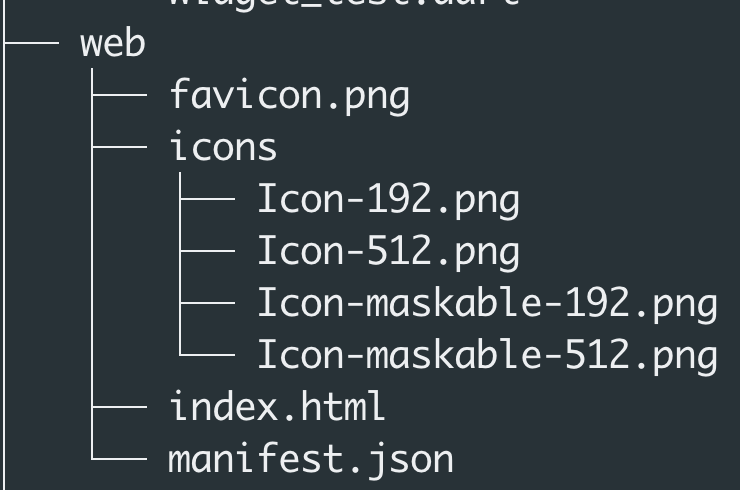
cd flutterfirebaseYou will find a web folder inside the project:

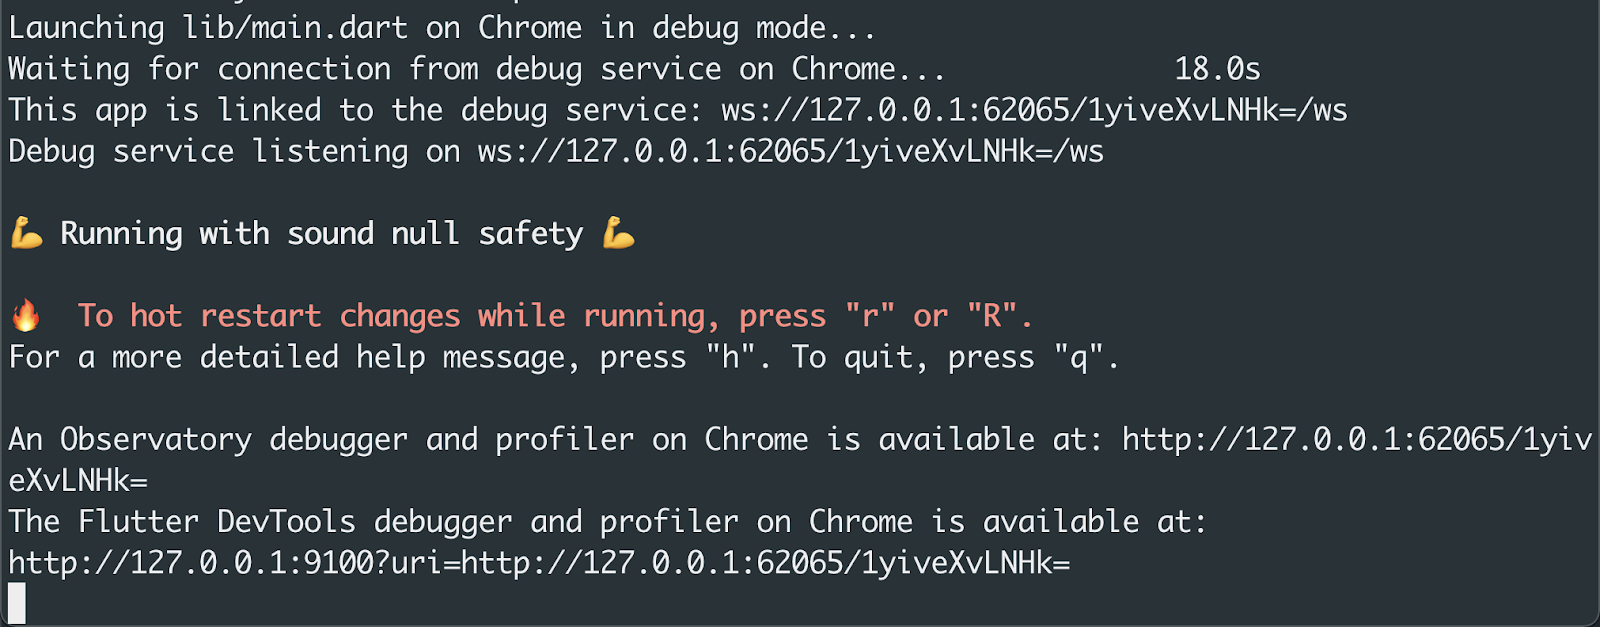
- Run the web application by the following command:
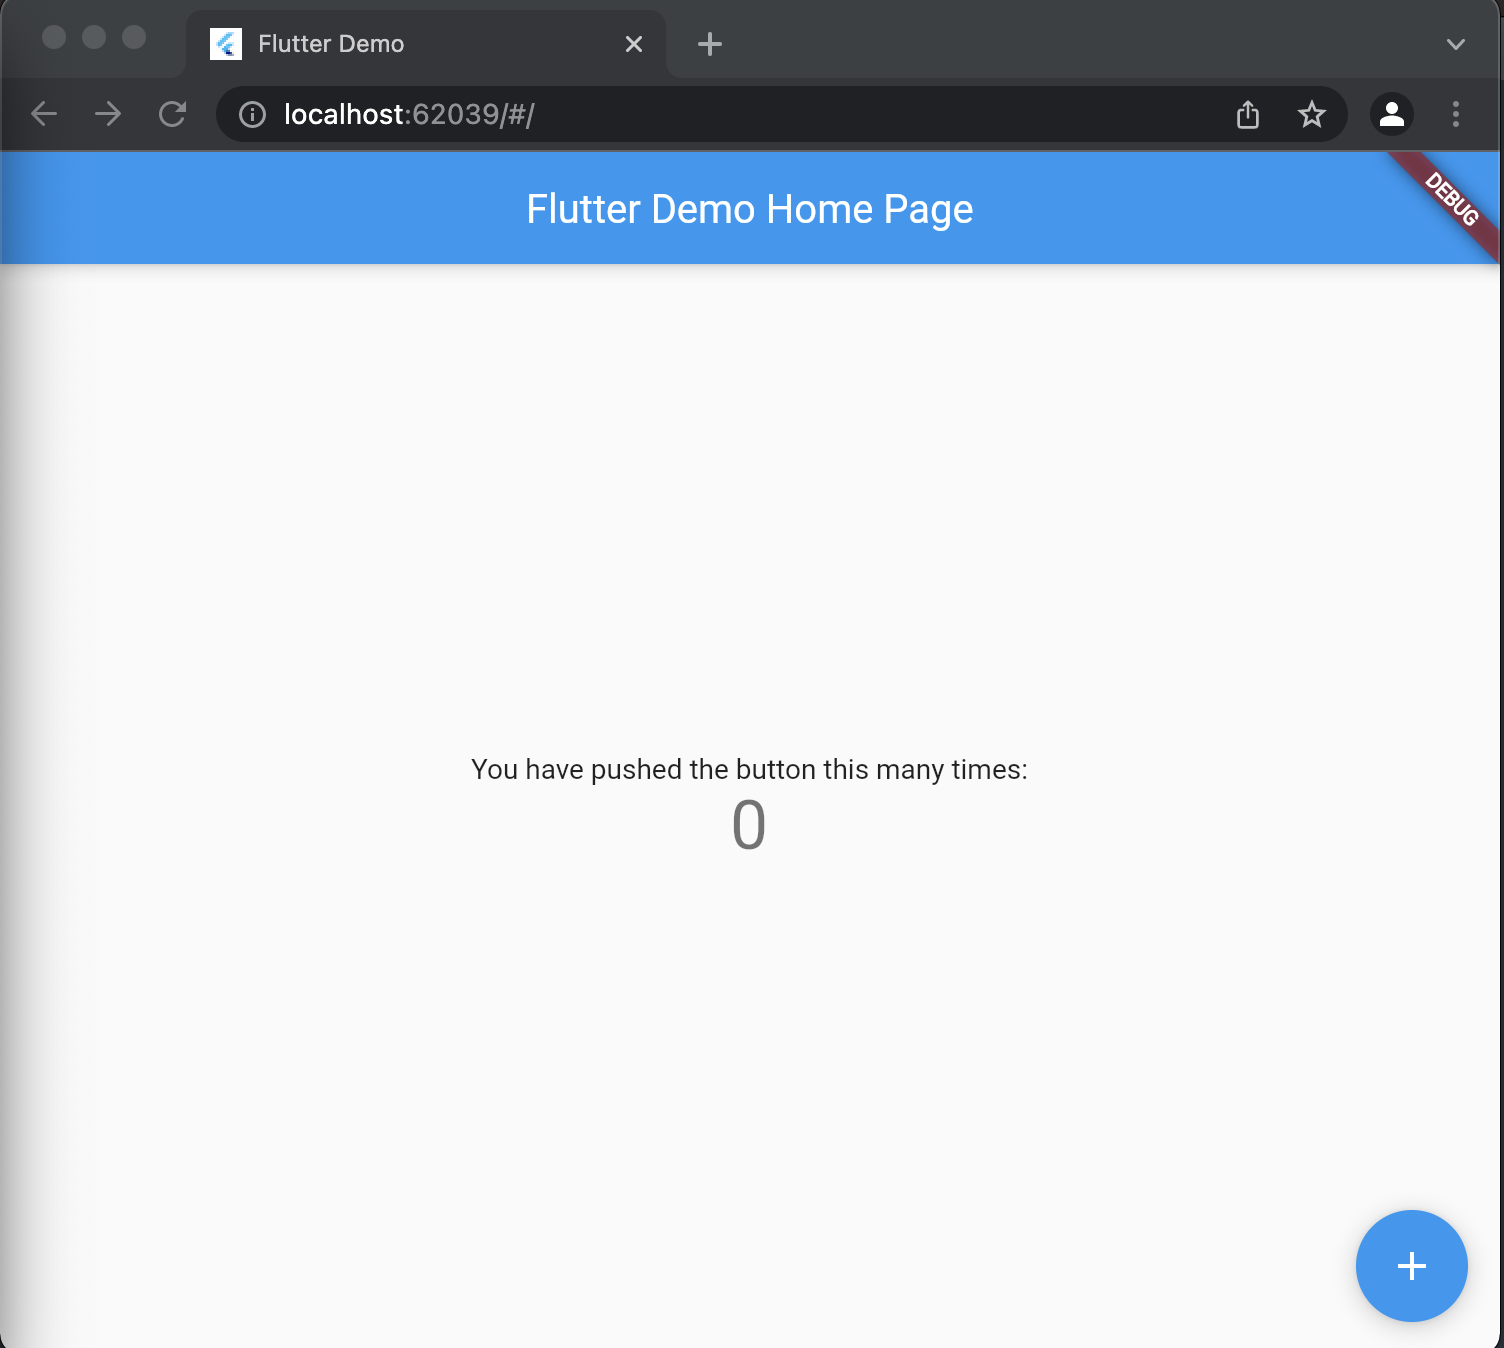
flutter run -d chromeAfter the app is built successfully, it will be opened in a chrome session with the localhost URL
- Now we need to build the web application by the following command:
flutter build web- The web application will be built successfully and you can find the web folder inside the build folder.
Add Firebase to your Flutter app
We need to add Firebase to your Flutter application, so in order to do that, they have these requirements:
- Google Account
- NodeJS
- Firebase CLI: we can deploy websites from the local directory on our computer or CI server to our hosting server.
- Sign into Firebase using your Google account.
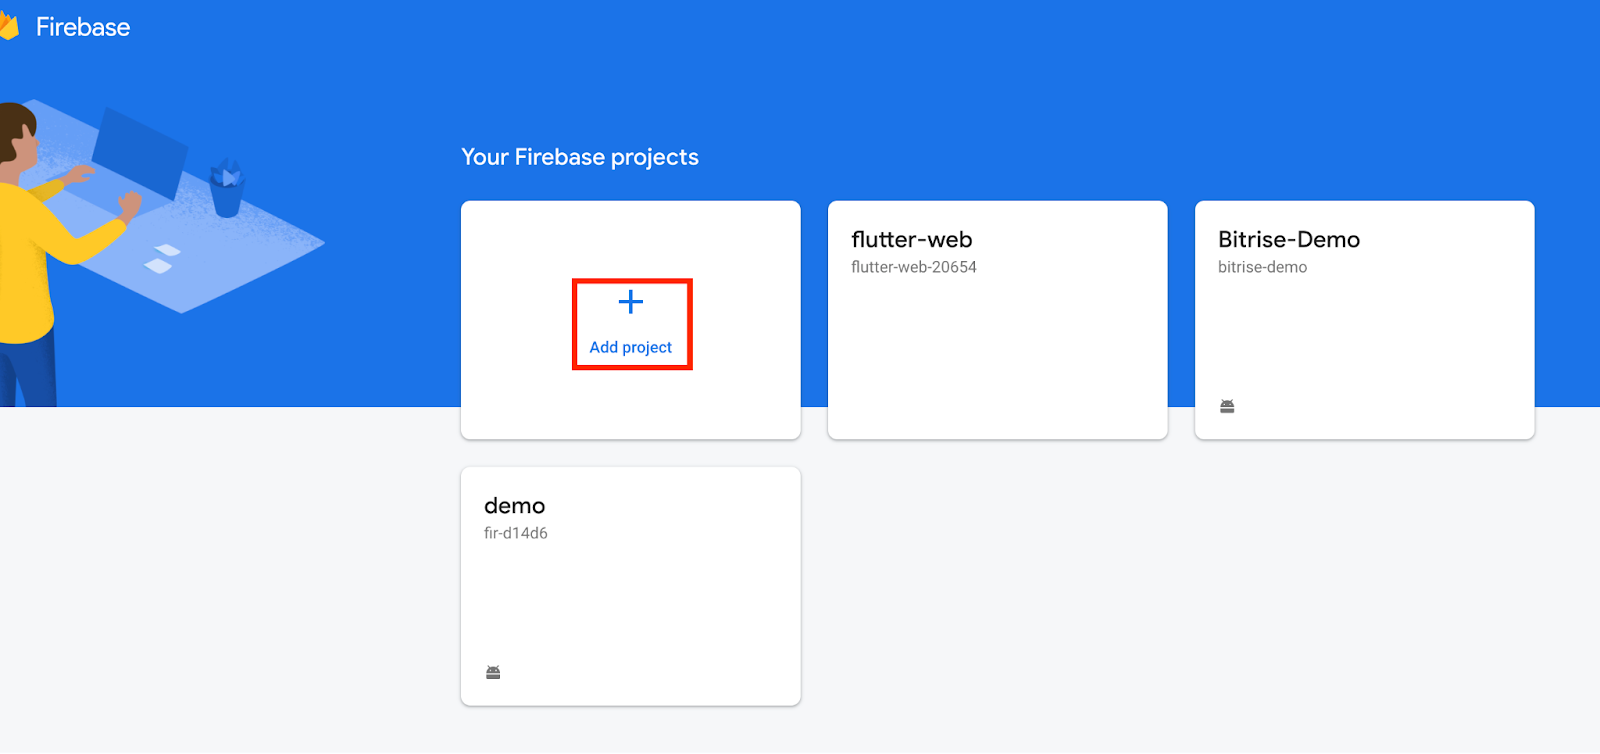
Before you can add Firebase to your Flutter app, you need to create a Firebase project to connect to your app.
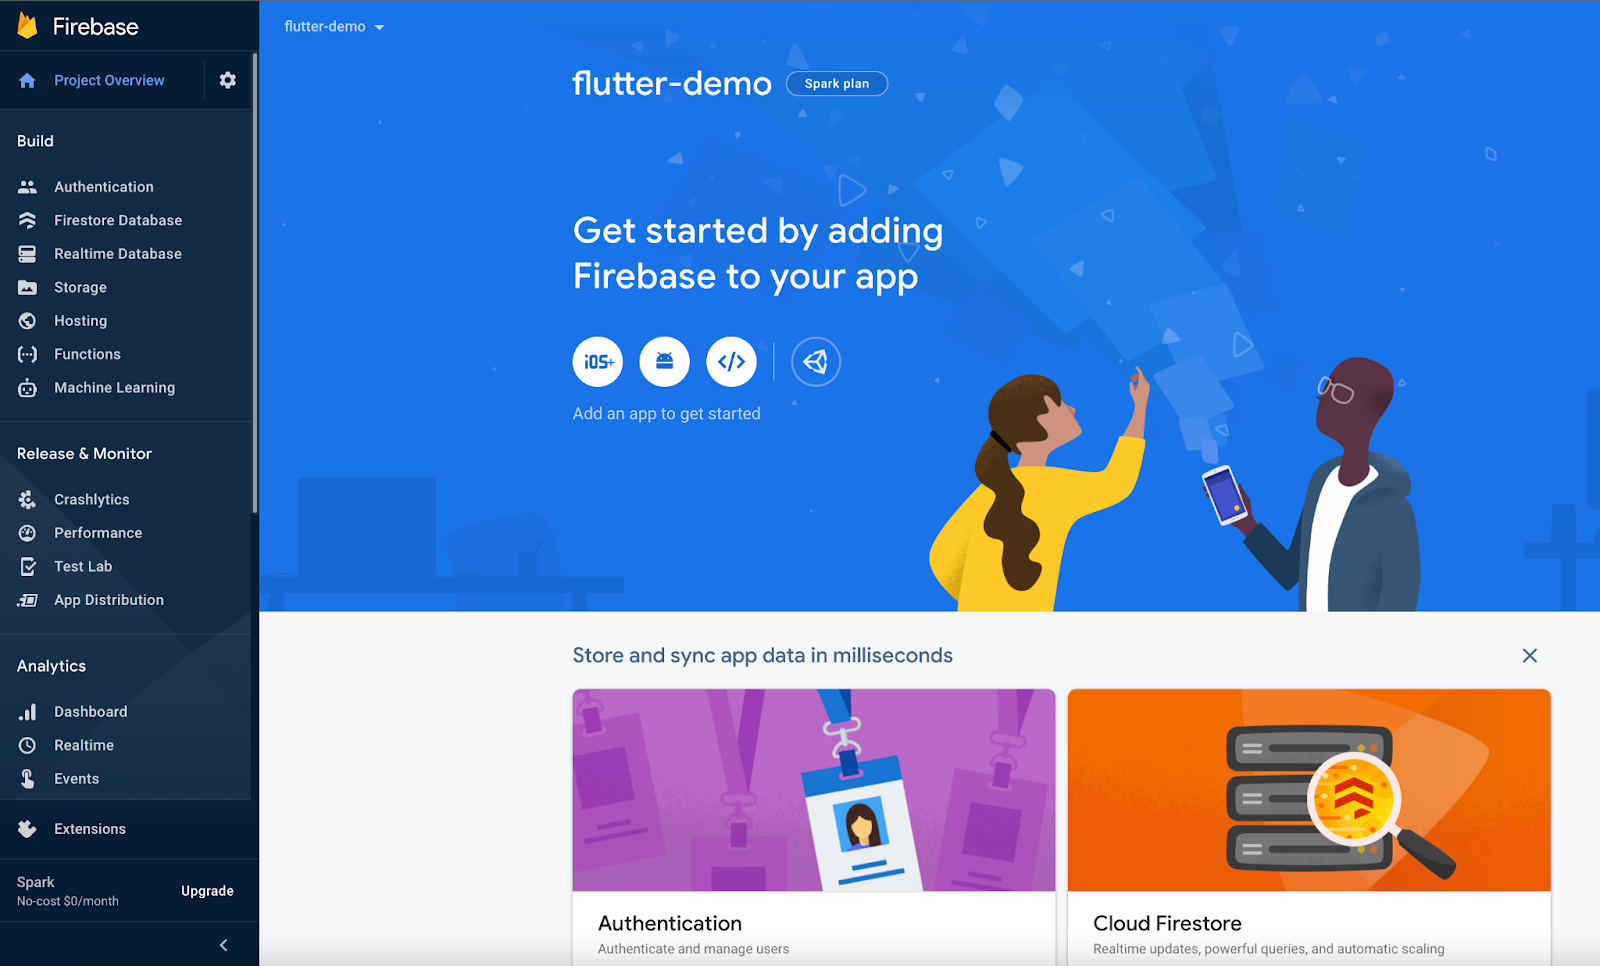
- In the Firebase console. click Add project:
- Add the project name (flutter-demo)
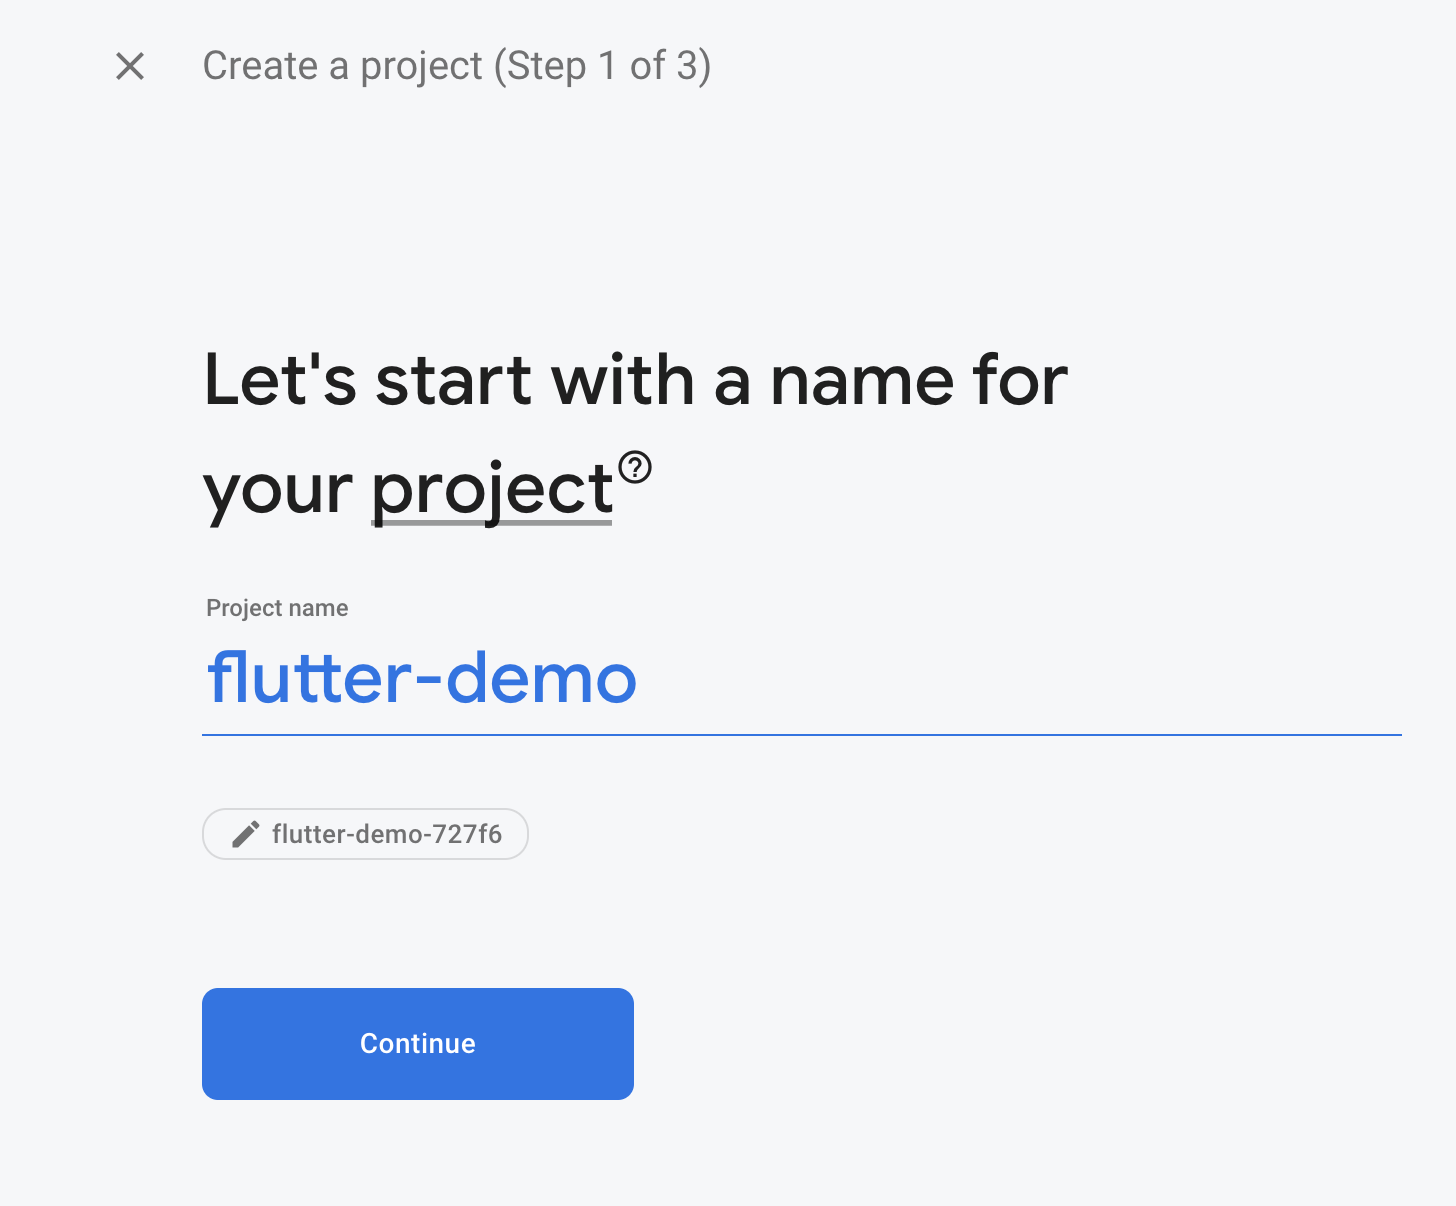
- Click Continue
- Disable Google Analytics for this project because it’s not needed and click Create project
- The project is ready now and you can click Continue

- The project dashboard will be displayed and you can check the different Firebase services such as Hosting
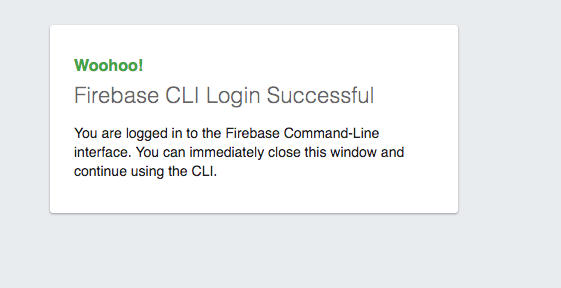
- Inside our project, we have to login into firebase from the command line. Type in the following command:
firebase loginIt will take you to the sign-in page in the browser, once you’ve successfully logged in, it will show you this message:
- Initialize the Firebase project you have to enter the command:
firebase init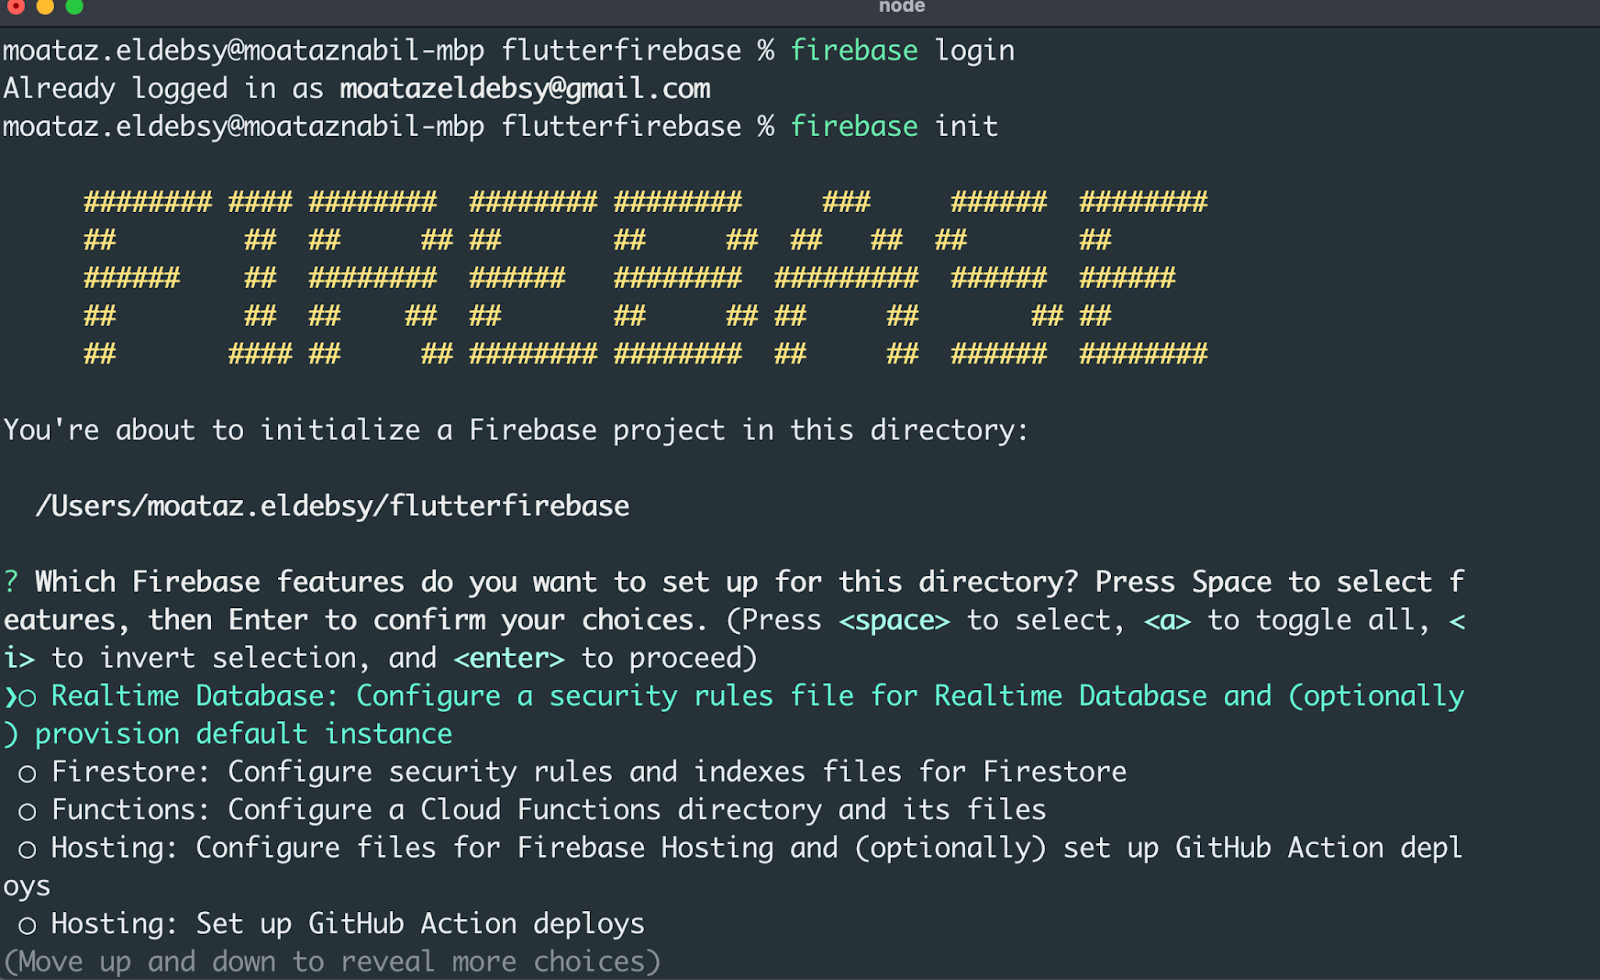
- You should select 'Hosting: Configure files for Firebase Hosting' (press the space button to select it)
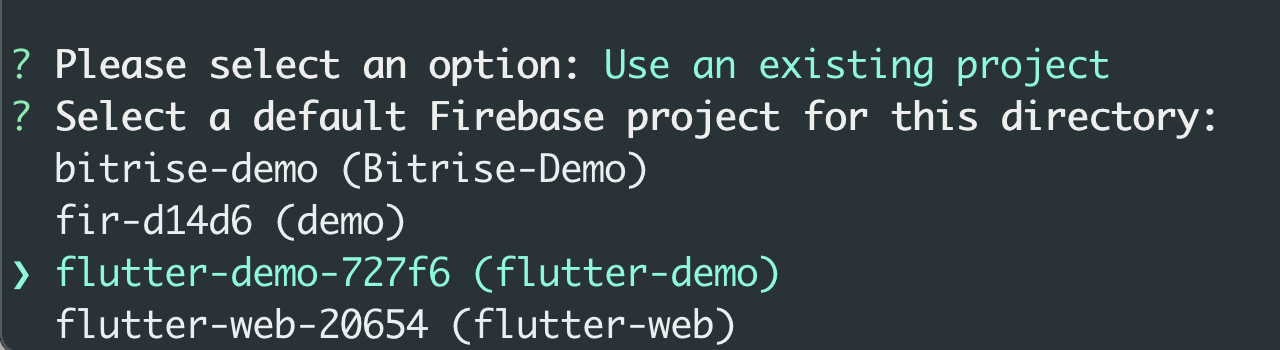
- Select 'Use an existing project'
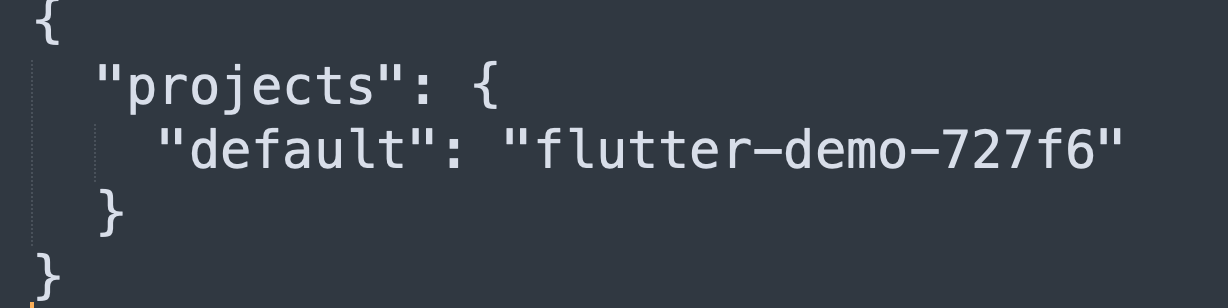
- Select the project that we created above: flutter-demo
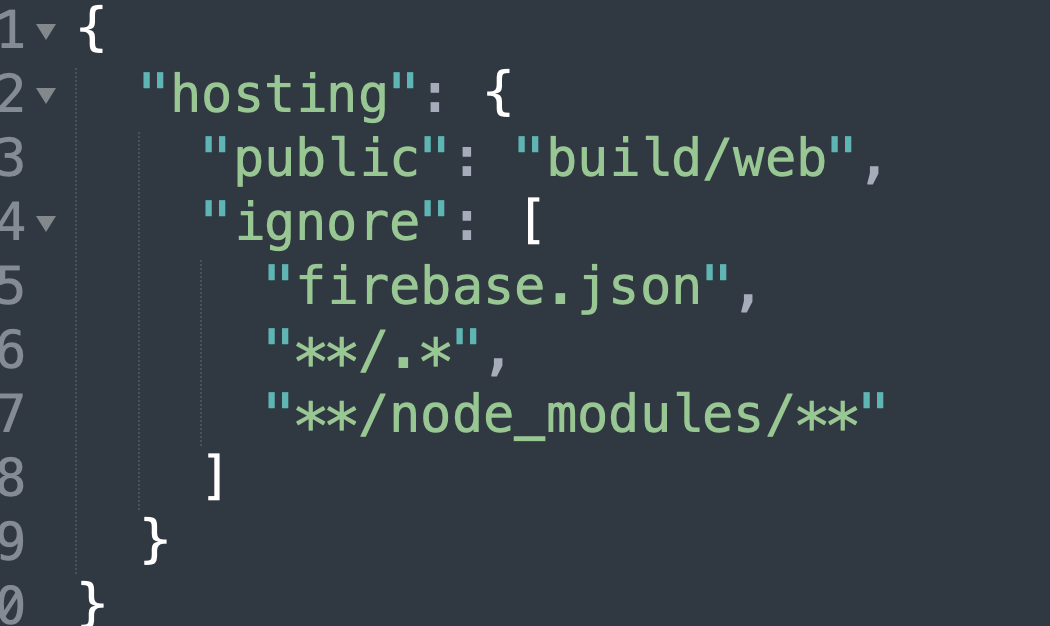
- For Hosting setup you need to specify the directory, we will change it to build/web
- It will ask you whether your application is a single page or not, for now, enter y
- It will ask you whether you need to set up automatic builds and deploys with GitHub, enter N
- And don’t overwrite the index page

- The Firebase project will be initiated successfully with the configuration files firebase.json and .firebaserc files
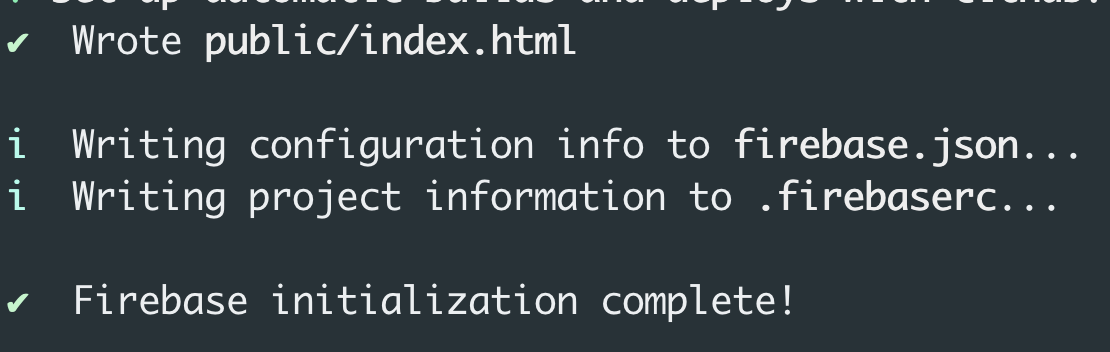
- For deploying the project to Firebase Hosting, you need to run the following command:
firebase deployCongratulations! your website is now live.
You can check by going to the Hosting URL, which is provided in the command line or you can refresh the Firebase Hosting console to see the website already deployed, and you can access it from there as well.


Push the project to a repository, such as GitHub, to be ready to configure it with your CI system such as Bitrise.
Deploy to Firebase Hosting from Bitrise
I’m assuming that you already have a Flutter project on Bitrise linked with your Flutter application. In case you don’t have it, you can follow these steps to set up your first project. With Bitrise, publishing to Firebase Hosting is a straightforward and simple process as the Firebase CLI is already pre-installed on our virtual machines.
Note:
To be able to deploy a Flutter web application to Firebase Hosting via Bitrise, you will need to generate a Firebase token. In order to do that:
- run firebase login:ci in your local terminal.
- After running the command, your default browser should prompt for authorization to your Firebase project, when access is granted, the necessary token will appear in your terminal.
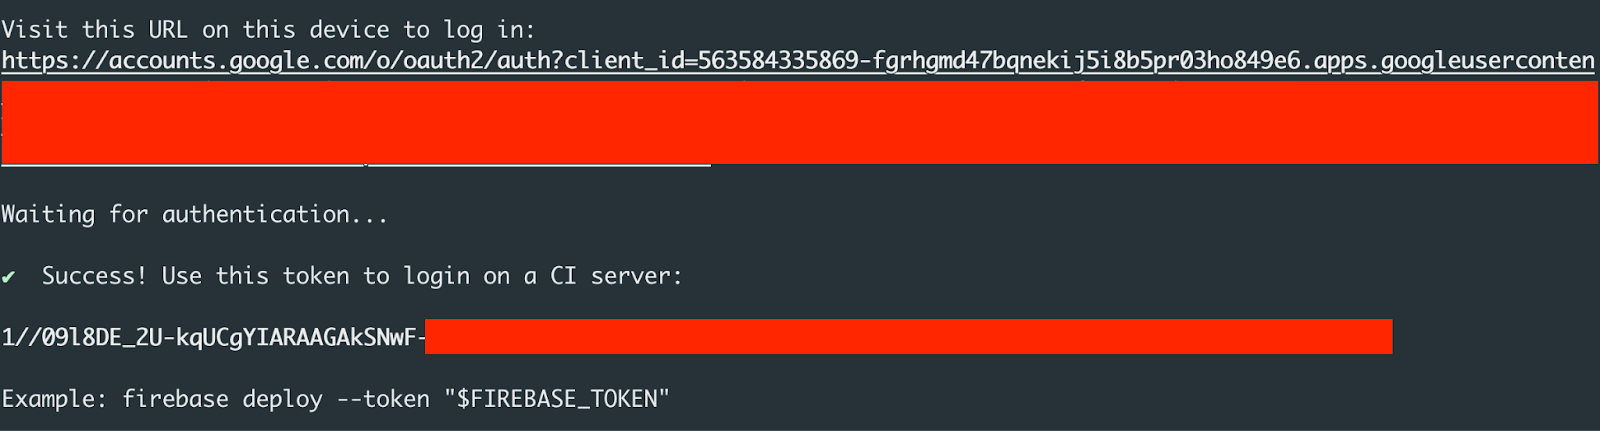
- Copy and the token.
- Add your token as a secret environment variable with the name FIREBASE_TOKEN.

- Add a Flutter Step to build the web application by the following command:
flutter build web
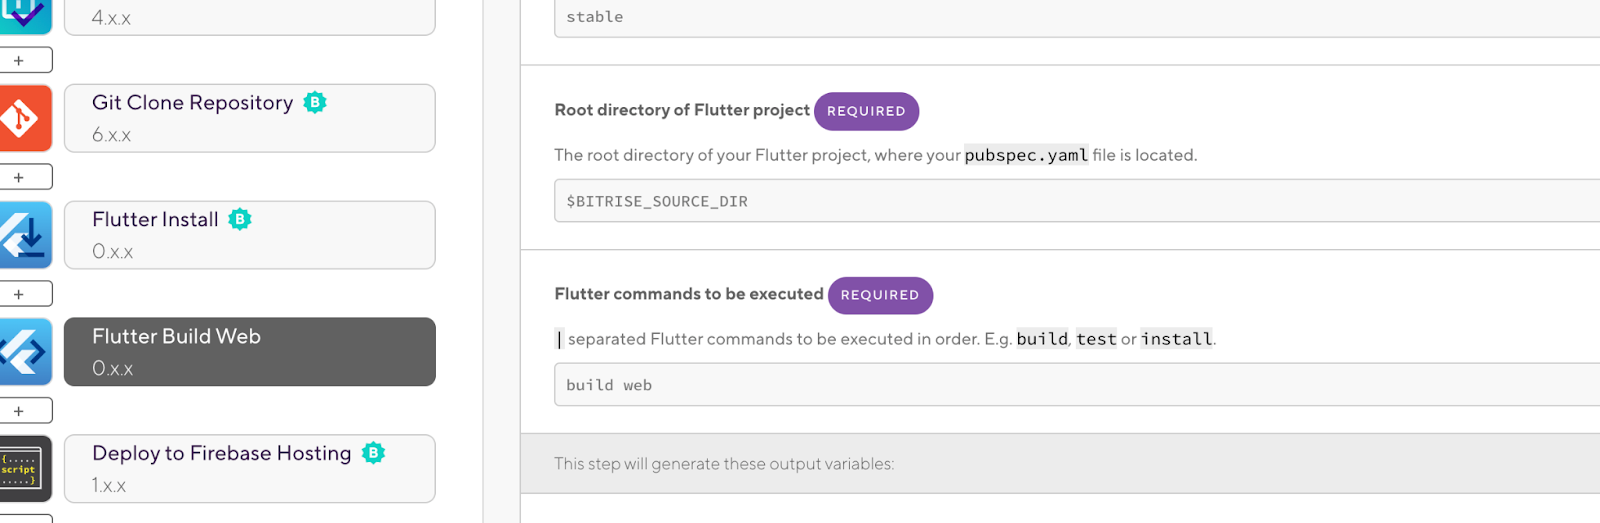
- Add a Script step in the workflow and the following command:
firebase deploy --token $FIREBASE_TOKEN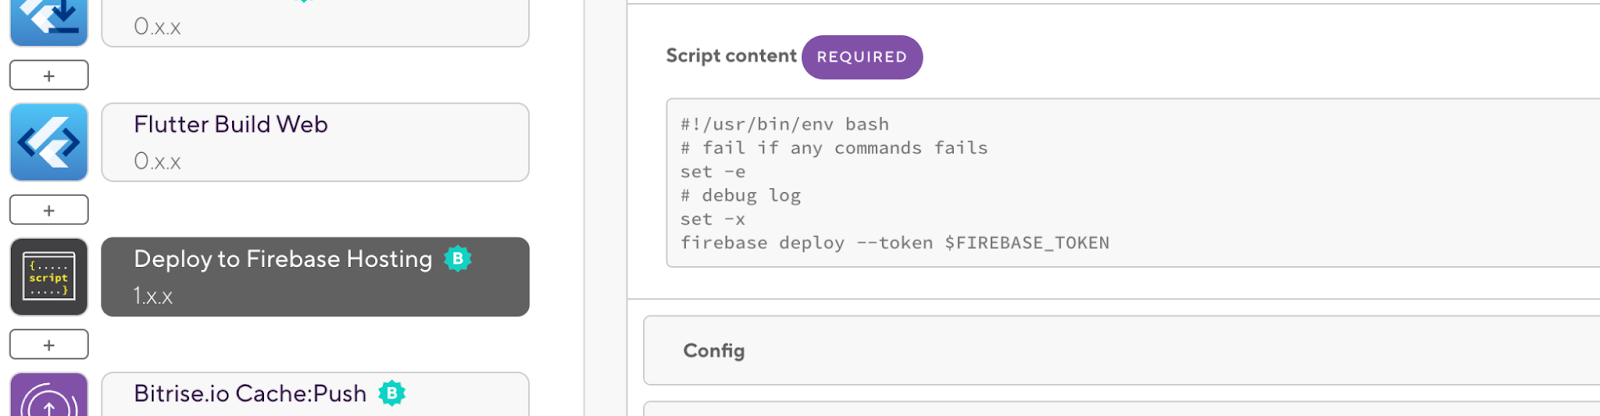
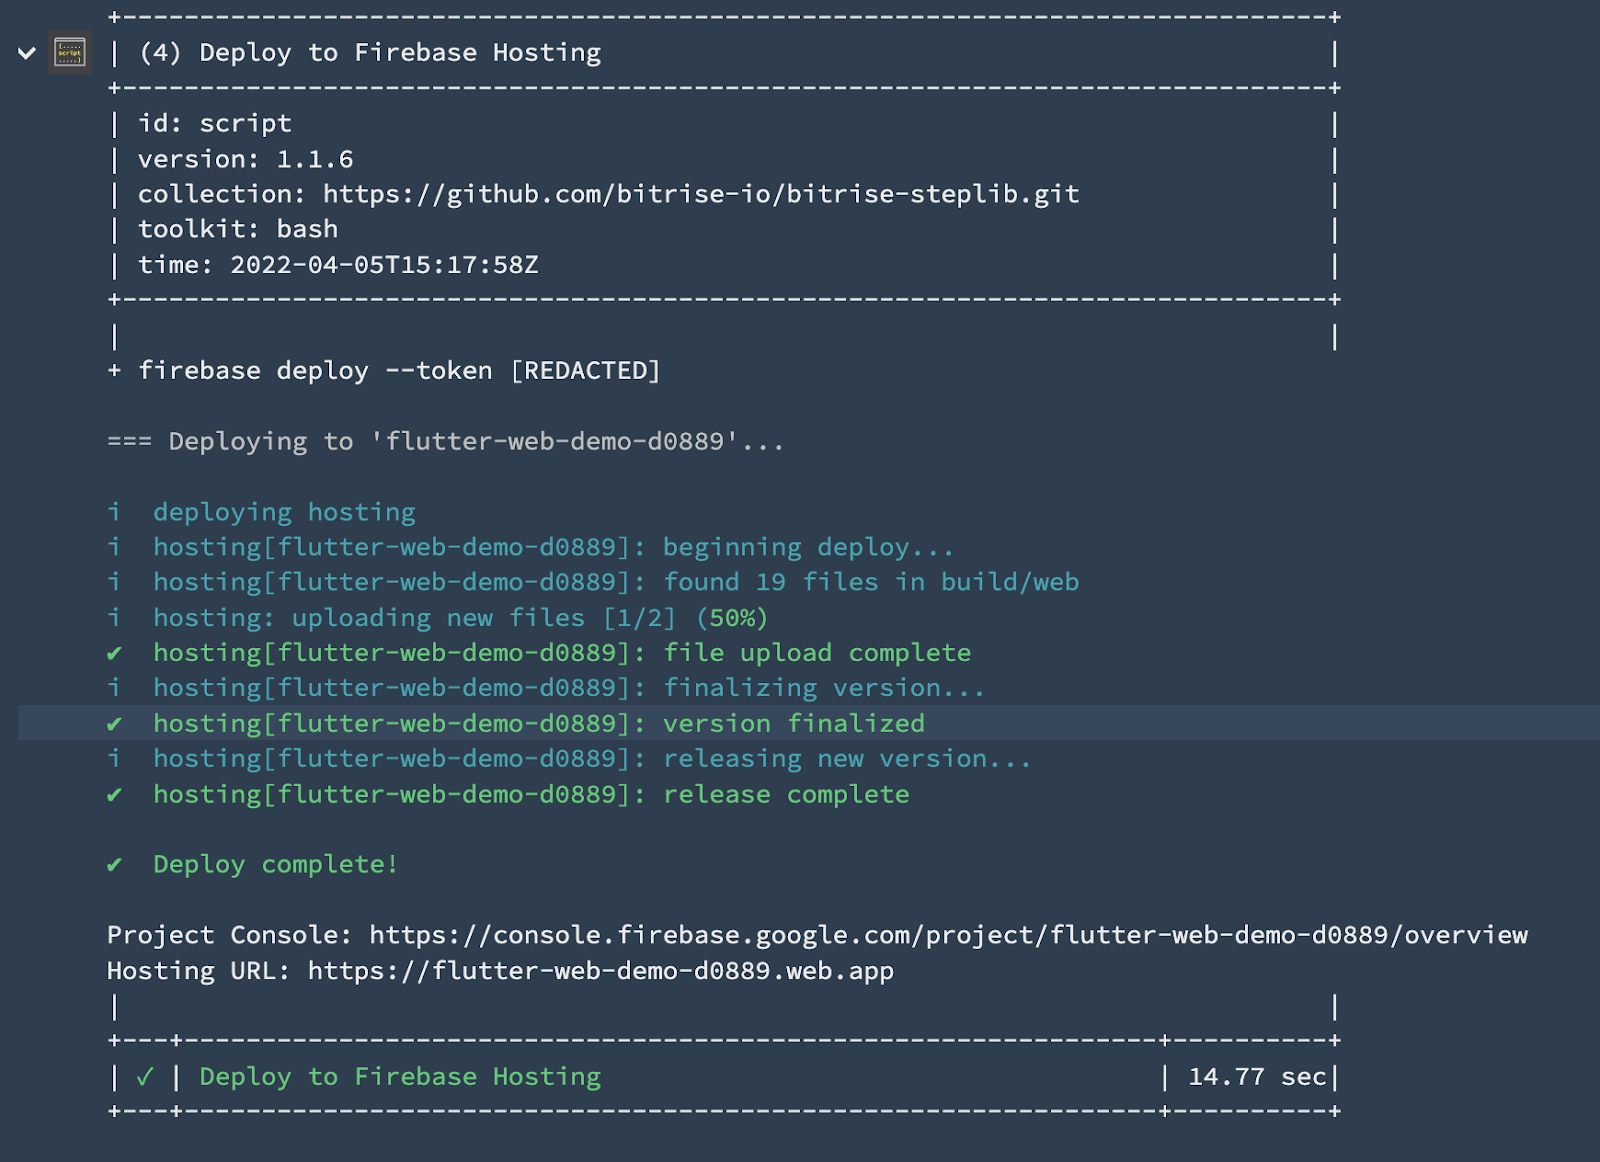
When the build is successful, you can see your application published to Firebase Hosting. You can find the direct URL to the deployed build also from the log.
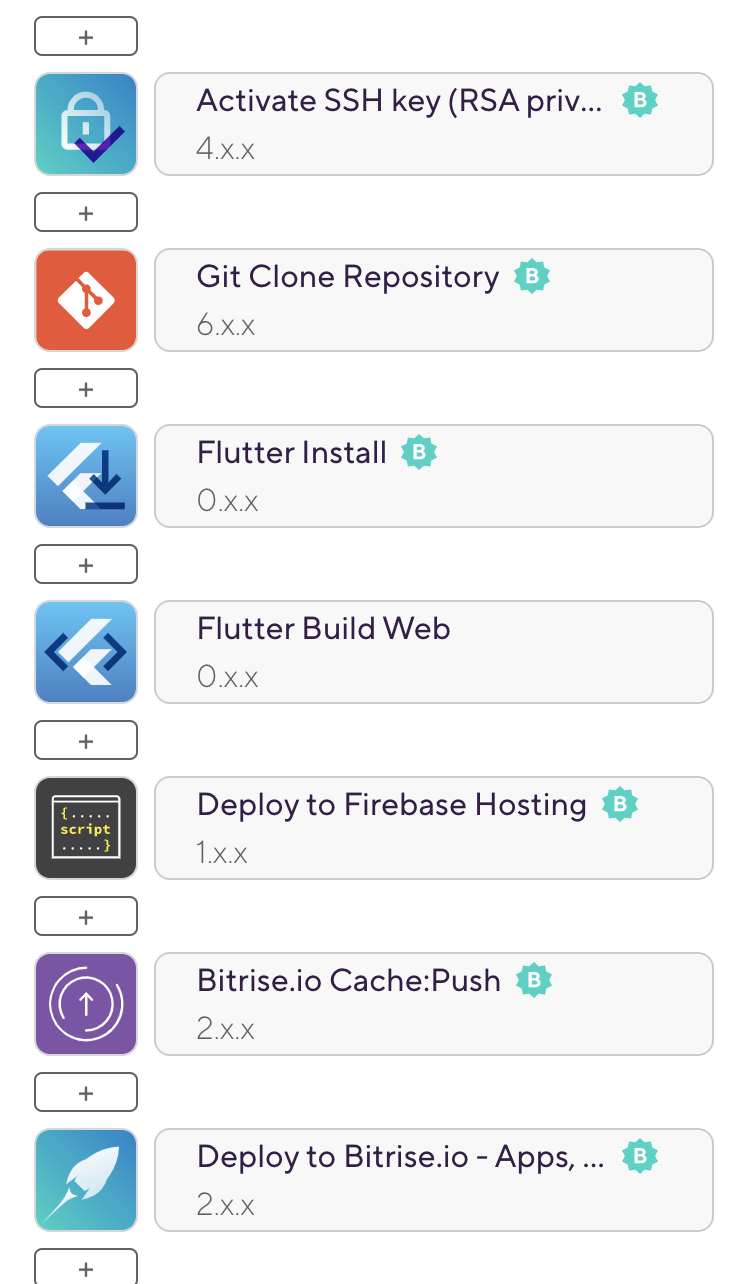
And the final workflow should be like the following image.
What’s next?
You're given a Firebase sub-domain, but you can also choose to serve your content on a custom domain, such as myawesomeapp.com.
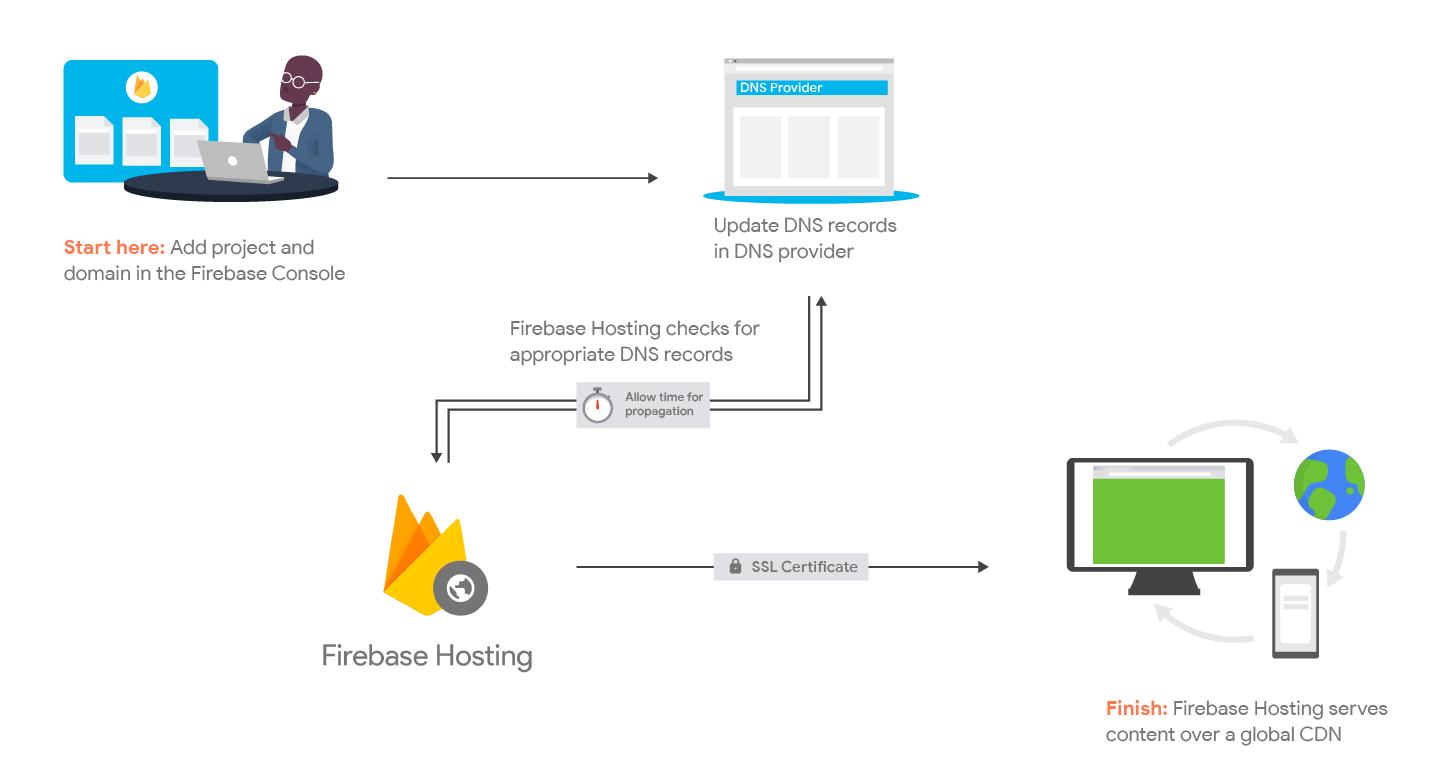
A global CDN and SSL certificate are provided by Firebase Hosting for each of your domains. These custom domains can be on different 3rd parties services such as GoDaddy, Amazon Route 53, or other services.

.jpg)
.jpg)
